 Save
Save My neighbor brought these to a block party last summer, and I watched a tray of thirty disappear in under ten minutes. The combination of nostalgia and indulgence hit everyone at once—adults and kids alike hovered around the dessert table, clutching napkins and coming back for seconds. I asked for the recipe on the spot, and she laughed, saying it was just the classic treat with a chocolate upgrade. That weekend, I made my first batch, and the kitchen smelled like a candy shop mixed with Saturday morning cartoons.
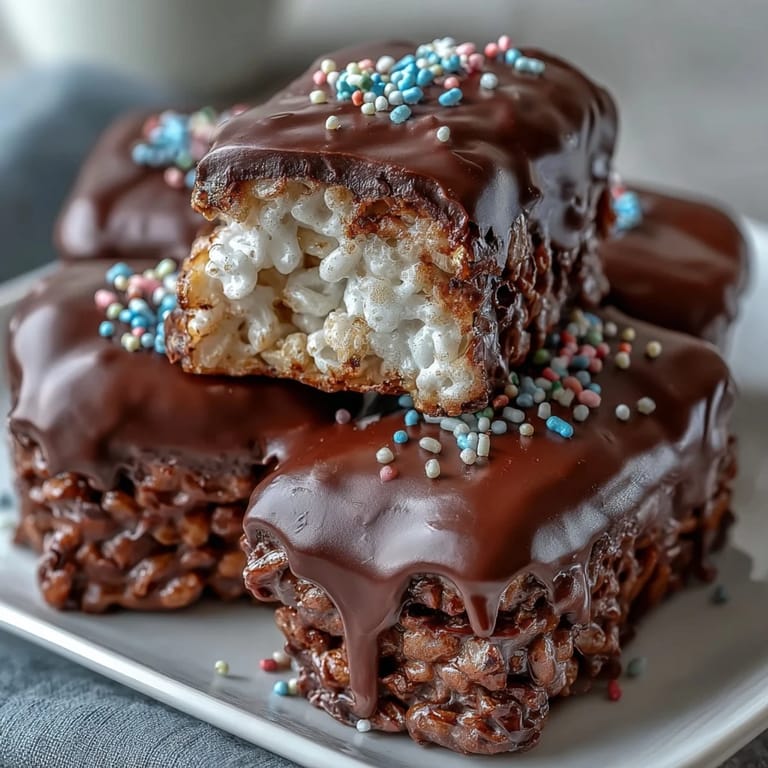
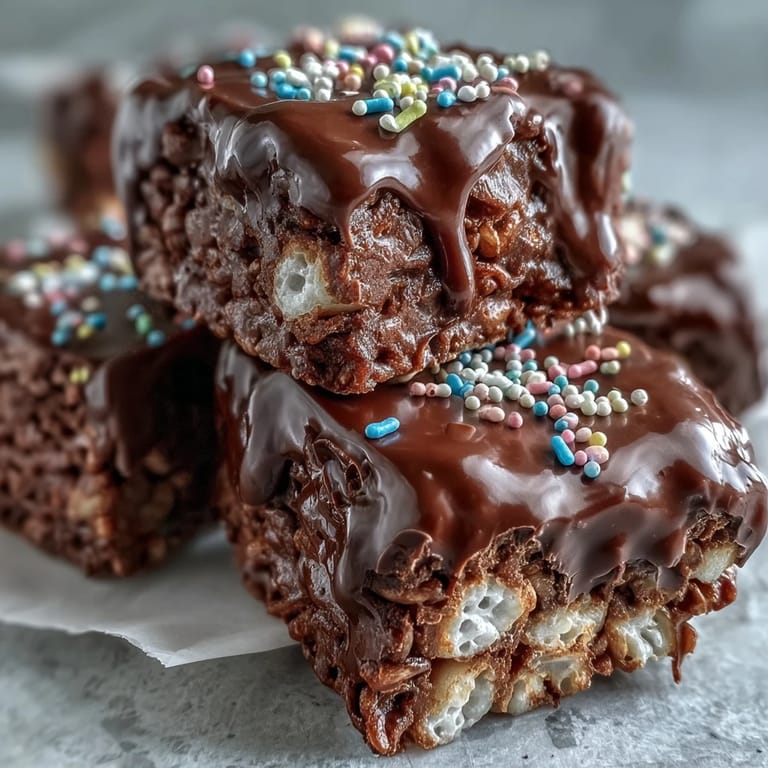
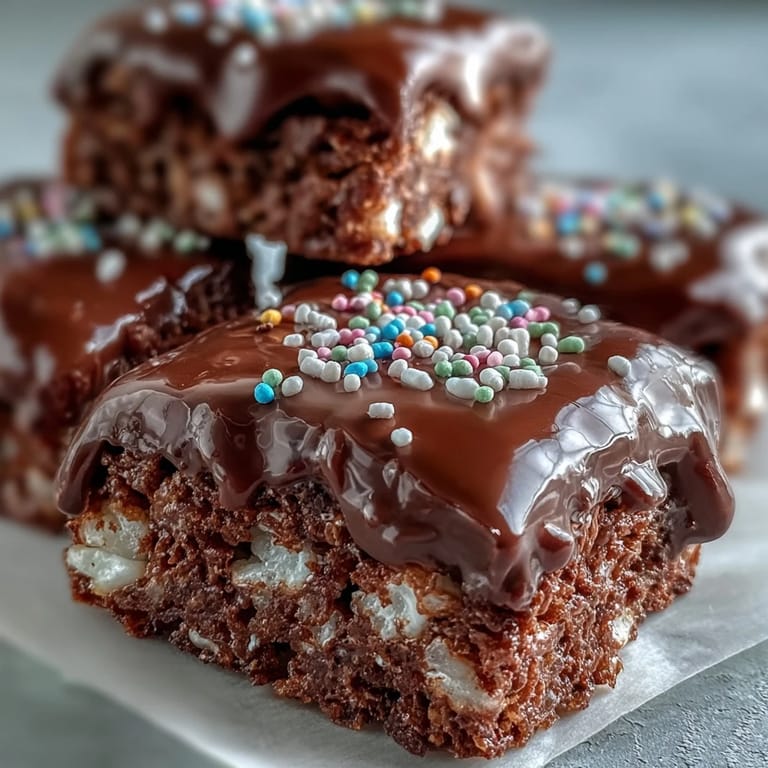
The first time I made these for my sons birthday, I let him choose the sprinkles, and he picked three different jars, insisting on a rainbow explosion. We stood side by side at the counter, pouring melted chocolate and tossing handfuls of color across the top, laughing when some missed the pan entirely. Those treats became the star of the party, and every kid left with sticky fingers and requests for the recipe. Now, whenever he asks to bake together, he pulls out the marshmallows and cereal before I even suggest it.
Ingredients
- Unsalted butter: Use unsalted so you can control the salt level, and always have extra on hand to grease your spatula, which prevents the sticky mixture from clinging to everything.
- Mini marshmallows: The small size melts faster and more evenly than large marshmallows, creating a smooth, glossy binding that coats every piece of cereal without clumping.
- Rice Krispies cereal: The iconic snap, crackle, and pop is essential here, but make sure the box is fresh so the cereal stays crisp and doesnt turn chewy.
- Fine sea salt: A pinch balances the sweetness and deepens the chocolate flavor, but skip it if youre using salted butter or prefer pure sweetness.
- Semisweet or dark chocolate chips: Semisweet gives you classic candy bar vibes, while dark chocolate adds a grown-up edge and cuts through the sugary marshmallow base.
- Vegetable oil or coconut oil: This small addition keeps the chocolate smooth and pourable, preventing it from seizing or turning grainy as it cools.
- Rainbow sprinkles or chopped nuts: Sprinkles add color and whimsy, while toasted nuts bring crunch and a nutty richness that pairs beautifully with chocolate.
Tired of Takeout? 🥡
Get 10 meals you can make faster than delivery arrives. Seriously.
One email. No spam. Unsubscribe anytime.
Instructions
- Prep the pan:
- Grease your baking pan generously with butter, making sure to get into the corners where the mixture loves to stick. If you have parchment paper, line the pan and leave an overhang on two sides for easy lifting later.
- Melt the butter:
- Set your burner to low and melt the butter slowly, stirring often to keep it from browning or burning. The gentle heat ensures the marshmallows will melt smoothly in the next step.
- Melt the marshmallows:
- Add the mini marshmallows to the melted butter and stir continuously until theyre completely smooth and glossy, with no lumps remaining. Remove the pan from heat immediately to prevent the mixture from caramelizing.
- Season and mix:
- Stir in the sea salt if youre using it, then add the Rice Krispies cereal all at once. Fold gently with a spatula until every piece is coated in marshmallow, working quickly before the mixture cools and stiffens.
- Press into the pan:
- Scrape the mixture into your prepared pan and press it down firmly with a buttered spatula or lightly greased hands. An even, compact layer ensures clean cuts and prevents crumbling later.
- Cool briefly:
- Let the base sit at room temperature for about ten minutes so it firms up slightly before you add the chocolate. This prevents the chocolate from sinking into the cereal layer.
- Melt the chocolate:
- Combine the chocolate chips and oil in a microwave-safe bowl, then heat in thirty-second bursts on medium power, stirring after each interval. Stop as soon as the chocolate is smooth and glossy to avoid scorching.
- Pour and spread:
- Pour the melted chocolate over the cooled cereal base and spread it evenly with an offset spatula or the back of a spoon. Work quickly so the chocolate stays fluid and covers every inch.
- Add toppings:
- Immediately scatter your sprinkles, chopped nuts, or any other toppings over the wet chocolate. Press them gently so they adhere as the chocolate sets.
- Set completely:
- Let the treats sit at room temperature for at least an hour, or pop them in the fridge for twenty to thirty minutes if youre in a hurry. The chocolate should be firm and snap cleanly when you cut.
- Cut into bars:
- Lift the block out using the parchment overhang or invert the pan onto a cutting board, then use a sharp knife to cut into twelve to sixteen bars. Wipe the knife between cuts for the cleanest edges.
 Save
Save I brought a batch of these to a coworkers retirement party, and by the end of the afternoon, three people had texted asking for the recipe. One woman told me it reminded her of treats her grandmother used to make, except fancier, and she wanted to recreate that memory for her own grandkids. Hearing that made me realize how food bridges generations, turning simple ingredients into stories we pass down and reinvent with our own little twists.
Flavor Variations to Try
Once you master the basic version, this recipe becomes a playground for creativity. Swap the semisweet chocolate for white chocolate and toss on freeze-dried strawberries for a fruity twist, or use milk chocolate and top with crushed Oreos for a cookies-and-cream vibe. I once stirred a tablespoon of peanut butter into the melted marshmallows and drizzled the chocolate with extra peanut butter, and those bars vanished faster than any batch before. You can even skip the chocolate entirely and press a layer of caramel or Nutella on top for a completely different treat.
Storage and Gifting Ideas
These bars keep beautifully in an airtight container at room temperature for up to three days, or in the fridge for a full week if you prefer a firmer, snappier texture. I like to cut them into squares, wrap each one in wax paper, and tie them with ribbon for easy grab-and-go snacks or party favors. They also freeze surprisingly well for up to a month, so you can make a double batch, stash half, and pull them out whenever you need a quick dessert. Just let them thaw at room temperature for about fifteen minutes before serving.
Troubleshooting Common Issues
If your bars turn out too hard, you likely overheated the marshmallows or let the mixture sit on the heat too long, which causes the sugar to caramelize and firm up. On the flip side, if theyre too soft and wont hold their shape, you may not have pressed them firmly enough or the butter-to-marshmallow ratio was off. The chocolate can crack if you refrigerate the bars too quickly, so always let them cool gradually at room temperature first.
- Use a light hand when folding in the cereal to avoid crushing it, which creates dense, chewy bars instead of airy, crispy ones.
- If the chocolate looks streaky or dull after setting, it may have been too hot when you poured it, so next time let it cool to about 88 degrees Fahrenheit.
- Always grease your hands or spatula before pressing the mixture, or youll end up with sticky fingers and an uneven surface.
 Save
Save Every time I make these, I think about how the simplest recipes often become the most memorable, not because theyre complicated, but because theyre the ones we share without hesitation. Whether youre baking for a crowd or just treating yourself, these chocolate-covered bars deliver pure joy in every bite.
Recipe FAQs
- → How long do chocolate covered treats stay fresh?
Store in an airtight container at room temperature for up to 3 days. For longer freshness, refrigerate for up to a week, though the cereal may lose some crispness in the fridge.
- → Can I use white chocolate instead?
Absolutely! White chocolate works beautifully and creates a lovely contrast. Try pairing with pastel sprinkles for a festive variation or dark chocolate swirls for extra visual appeal.
- → Why add oil to the chocolate?
The vegetable or coconut oil helps the chocolate achieve a smooth, glossy consistency and makes it easier to spread evenly. It also prevents the chocolate from cracking when you cut into the finished bars.
- → What's the best way to cut clean squares?
Let everything set completely at room temperature or refrigerate for 20-30 minutes first. Use a sharp knife and wipe it clean between cuts for the neatest edges. Lifting the entire block out using parchment paper also makes cutting easier.
- → Can I make these ahead for parties?
These are perfect for prep! Make them up to 2 days before your event. The chocolate actually improves after setting overnight. Cover tightly and store at cool room temperature until ready to serve.
- → How do I prevent sticking when pressing the cereal mixture?
Lightly butter your hands or spatula before pressing the mixture into the pan. This prevents the gooey marshmallow from sticking and helps you achieve an even, compact layer.